Related Articles
PERIPHERAL INTERFACE CONTROLLER (PIC)
PIC PROGRAMMING INSTRUCTION SETS
The first step is to install MPLAB SIM software in your PC, then create a new sub-directory in the main directory RT.
For example, in order to write a program to do mathematical addition, create a sub directory called add8 (just a name) in the main directory RT. Create a new directory in E drive in your name, say RT for every program
Similarly, to write any program, create a new sub-directory with suitable name in the main directory RT.
While assembling the program, MPLAB will create several files with name extensions like LST, HEX, ERR etc in the same sub-directory.
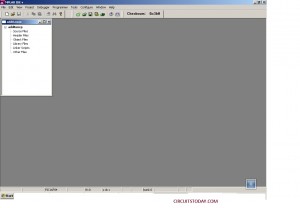
1)Â Double click the MPLAB icon on desktop. The screen will appear as shown below
2)Â Â Â Â In the tool bar, select Project.
3)Â Â Â Â Drop down menu will appear
4)Â Â Â Â Select new project.
The screen will appear as shown below
5)Â Â Â Â In the project directory form space, type E:/ RT / add8. Similarly in the project name type the same name add8
6)Â Â Â Â From the tool bar select File.
7)Â Â Â Â A drop-down menu will appear
8)Â Â Â Â Select New, and then select assembler, the screen will appear as below
9)Â Â Â Â Type your program in the window
10)Â Â Â Â The screen will appear as shown below
11)Â Â Â Â Save your program with the same name and in the same sub directory.
12)Â Â Â Â Now click on Project on the tool bar.
13)Â Â Â Â From the drop down menu, select Add file to project.
14)Â Â Â Â In the left hand side of the screen, below the source file, the file name which you just saved will appear.
The screen will appear as shown below
15)Â Â Â Â Click on Project from the tool bar.
16)Â Â Â Â From the drop down menu, select Build all to assemble the file.
17)Â Â Â Â If there is no error, Build succeeded will appear, Otherwise the number and types of errors occurred will appear in the window as shown below
18)Â Â Â Â Select Configure from the tool bar.
19)Â Â Â Â From the drop-down menu select Device
20)Â Â Â Â From the new window select the device 16F877 and say OK
21)Â Â Â Â This is to select the appropriate SFRs for the selected device.
22)Â Â Â Â Select Debugger from the tool bar
23)    Select  Select Tool from the drop down menu
24)Â Â Â Â Select MPSIM from the sub menu.
25)Â Â Â Â Select View from the tool bar
26) select File Registers from the drop down menu
27) Select Special Function Registers from the same drop down menu
28) Two new windows will appear, displaying the content of file registers and SFR.
The screen will appear as shown below
29)Â Â Â Â Select Window from the tool bar
30)Â Â Â Â Select tile horizontally option
The screen will appear as shown below
31) Select Debugger from the tool bar
32) select Reset from the drop down menu
33) Select Processor Reset from the sub menu
Now press the key F7 to execute one instruction in the program in a single step mode of operation. Repeatedly press F7 to execute other instructions.
Check file registers and Special Function Registers to verify the result of executing each instructions till the end of the program.
After assembling the program, the MPLAB generates other files in the same sub-directory. The add8.hex is needed to be downloaded into the kit using any serial software.
For downloading your HEX file into the kit, connect the kit in USB mode with the computer.
Select and double click on PICFlash2.exe file on the desktop.
A window will appear as shown in the figure below
Click Load HEX file, then select the required HEX file from the sub-directory
Click on Oscillator and select option XT.
Click on WRITE option in the PICFlash2 programmer window for downloading your hex file.
Now the hex file gets down-loaded into the kit.
Press RESET key in the kit to execute the program and the see/observe the result.
2) Select Window from the tool bar
3) Select tile horizontally option
The screen will appear as shown below


here is the link http://ww1.microchip.com/downloads/en/DeviceDoc/MPLAB_IDE_v8_63.zip
Thanks for Sharing. But where is the MPLAB SIM software link to download.. kindly provide the MPLAB SIM software…